
Felt fabric is a brilliantly adaptable material that’s easy to work with, and perfect for a wide range of craft projects. As it doesn’t fray when cut, felt doesn’t require hemming, which makes it great for children’s sewing projects. It can also be used to beautifully reproduce the texture and shape of leaves and petals, creating stunning everlasting flowers that are a sustainable alternative to cut blooms. Read on to learn the key materials that you’ll need to get started with felt craft, and for our felt daisies project!
What is felt craft?

Broadly speaking, the term ‘felt craft’ covers any craft project that uses felt fabric as its main component. It can be used in two-dimensional sewing projects, such as appliqué, or combined with stuffing to create cute animals that kids will love. You can also easily (and quickly) create a wide array of projects using a hot glue gun, meaning that even crafters who don’t like sewing can enjoy trying felt craft!
What do I need to get started?

The main material that you’ll need to get started with felt craft is, of course, felt fabric! We’d recommend using a quality wool-mix felt, which tends to have an attractive matt finish, although fully synthetic alternatives are also available. For most projects we’d recommend a fabric density of around 300 grams, which is easy to work with, and particularly suitable for felt flower projects.

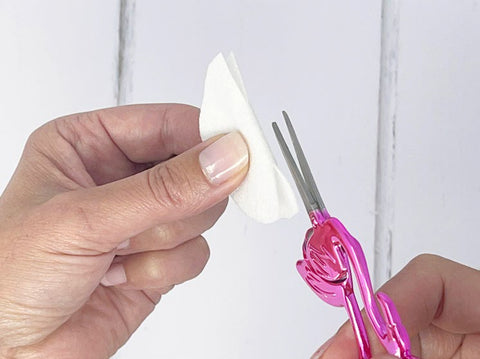
Sharp scissors are also a must-have! You might like to use curved scissors for rounded shapes, and a smaller pair of embroidery scissors for cutting out fine details. If you find yourself getting hooked by felt craft, it could be worth investing in a rotary cutter and self healing cutting mat, which will allow you to cut out several layers of fabric at once!

For no-sew projects, a glue gun is fast-drying, and will quickly become your go-to tool. Remember to switch on your glue gun a few minutes before you start using it, and proceed with caution - the glue will become hot! (While we know lots of young crafters who enjoy felt craft, we’d recommend careful supervision for children under ten.) It’s normal to see a little smoke from your glue gun, but don’t forget to turn it off when finished! You might find that you get little ‘trails’ of glue as you work, but you can usually pull these off your work once the glue dries.

For felt flower projects, you’ll also need floristry wire, which can be used to create stems and long leaf shapes. The thicker the wire, the lower its gauge number (18 gauge wire can be used for thicker stems to support larger flower heads, while 22 gauge is a thinner wire used for more delicate flowers). You might also like to wrap your wire with green or brown floristry tape for natural-looking stems.
What else might I need for felt flower projects?

We like to use chalk pastels to add naturalistic shading to our felt flowers, but you could also use coloured chalks, or even blusher or eyeshadow!

If you have needle felting supplies, you can use felting wool to create the centres of flowers such as poppies, or alternatively use pre-made felt balls, attached with glue. Top tip: for most flowers you can cut these in half with scissors, making your supplies go further!
We find it helpful to use wire cutters to bend our floristry wire, but you might also be able to use an old pair of blunt scissors for this.
How to make your own felt daisy flowers

Follow our instructions below to create three beautiful daisy flowers! Or, to make more, simply cut more wool - you'll need two squares for each daisy.
What you’ll need:
- White felt fabric
- Yellow felt balls
- Sharp scissors
- Glue gun and glue sticks
Step 1: To make three daisies, cut out six squares of white fabric, each measuring 6cm x 6cm.

Step 2: Cut all four corners off each white square to make six circles.

Step 3: Fold a circle of white felt in half. Snip around 1cm into each edge of the fold.
Step 4: Cut a further seven snips (each 1cm deep) into the folded felt. Begin with one snip at the mid-way point, and three evenly spaced either side of the midway point.

When you open the circle, you should have sixteen sections (and sixteen cuts).

Step 5: Now place your scissors in the middle of one section and snip in a slight curve towards the centre of the circle, to snip out a triangular section.

Repeat this step for all sixteen sections.

Step 6: Now flip the circle over and repeat step 13 for each section, creating petals.

Repeat these steps to create six circles with petals.

Step 7: Glue a yellow ball into the centre of one of the circles. Press it down firmly until the glue dries.

Step 8: Apply glue to the centre of another of the circles and stick it behind the circle with the yellow ball. Repeat this step to make another two daisies.

When finished, you can add your daisy flowers to a wreath, or attach them to brooch backs! Alternatively, why not make more daisies, and sew them onto rustic string or twine to make a beautiful daisy chain garland? Simply complete Step 8 before Step 7, then stitch the centre of the white flower onto your rustic string with a needle and thread before you glue on the yellow flower heart.
However you use your felt daisies, we'd love to see them - please share your creations with us on Facebook or Instagram!
Enjoying our blog posts? Join our mailing list to receive every new post straight to your inbox!
At The Crafty Kit Company we hate spam, we never share data and you can unsubscribe from our mailing list at any time.